
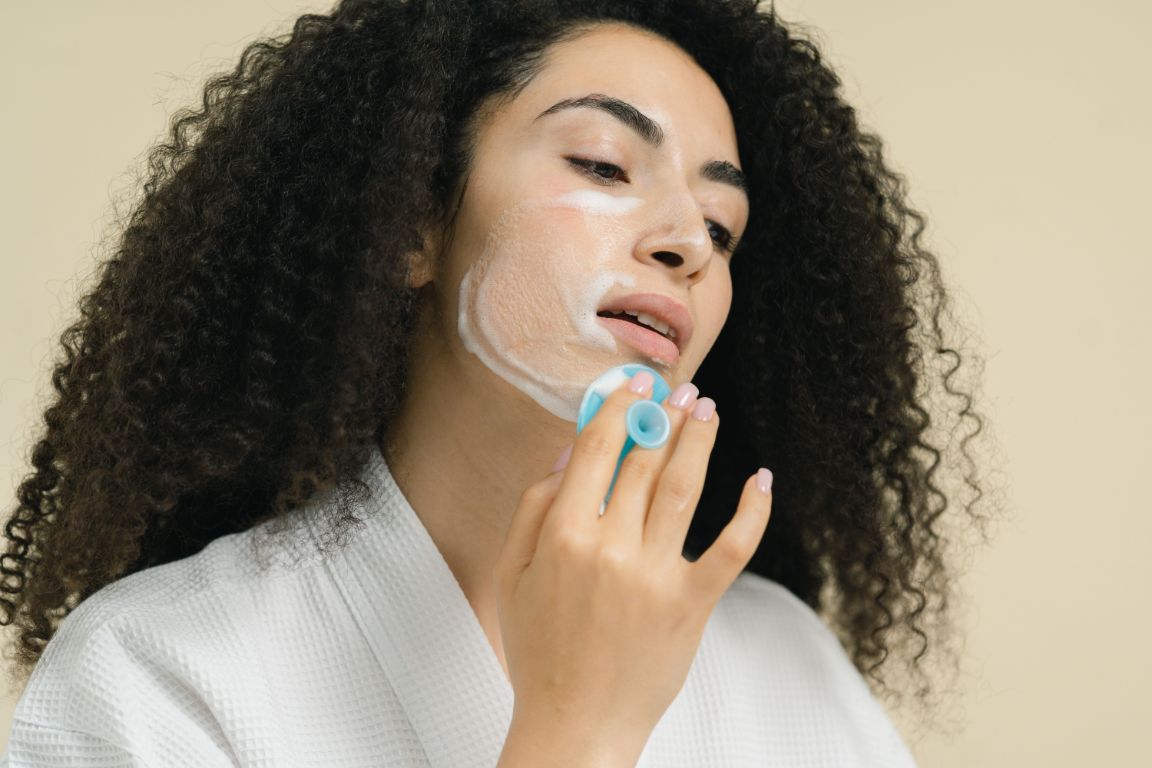
How to Use a Facial Cleansing Brush Properly
A facial cleansing brush can make cleansing feel more thorough, but using one too often or applying too much pressure can leave the skin feeling tight, dry, or uncomfortable.
The goal is not to scrub the face aggressively. A cleansing brush should move gently across the skin while the cleanser loosens sunscreen, makeup residue, oil, and daily buildup. The device does most of the work, so additional pressure is usually unnecessary.
Different brushes also require different routines. Rotating-bristle devices, vibrating silicone brushes, and manual cleansing brushes vary in strength, texture, and recommended frequency.
This guide explains how to use a facial cleansing brush properly, how often to use one, which cleanser to pair with it, and which common mistakes to avoid.
How to Use a Facial Cleansing Brush at a Glance
A basic routine looks like this:
- Remove heavy makeup first.
- Wet your face with lukewarm water.
- Wet the brush head when required.
- Apply a gentle cleanser to your face or brush.
- Turn on the device at its lowest setting.
- Move it gently across the skin.
- Avoid pressing or repeatedly scrubbing one area.
- Rinse your face thoroughly.
- Clean and dry the brush.
- Apply moisturizer.
Begin by using the brush once or twice per week rather than every day.
What Is a Facial Cleansing Brush?
A facial cleansing brush is a manual or powered tool used with cleanser to help remove surface buildup.
Common types include:
- Rotating-bristle brushes
- Oscillating or sonic brushes
- Silicone cleansing devices
- Manual facial brushes
- Dual-sided cleansing tools
- Cleansing and massage devices
Some devices have interchangeable heads for different skin types or uses.
A cleansing brush is not essential for an effective routine. Clean hands and a suitable cleanser may be enough. The brush is an optional tool for people who enjoy the extra cleansing step.
What Does a Facial Cleansing Brush Do?
Depending on the design, a facial cleansing brush may help:
- Distribute cleanser evenly
- Loosen sunscreen and makeup residue
- Remove excess oil
- Lift surface flakes
- Clean around the nose and hairline
- Improve the feel of skin after cleansing
- Make manual cleansing more consistent
It should not be expected to permanently shrink pores, remove deep scars, or replace treatment products.
Its main role is cleansing and light surface exfoliation.
Do Facial Cleansing Brushes Exfoliate?
Many cleansing brushes provide some physical exfoliation because the bristles or silicone points move across the skin.
The strength of that exfoliation depends on:
- Brush material
- Device speed
- Pressure
- Duration
- Frequency
- Cleanser used
- Skin condition
Even a soft brush can become irritating when used too frequently.
When using a cleansing brush, you may need to reduce other physical exfoliation in your routine.
Types of Facial Cleansing Brushes
Rotating-Bristle Brush
This type uses a circular brush head that rotates against the skin.
It may provide a stronger cleansing sensation but can feel too intense for some users.
Use:
- Minimal pressure
- Low speed
- Short sessions
- A soft brush head
Avoid holding the rotating brush in one place.
Sonic or Oscillating Brush
A sonic brush uses rapid side-to-side movement rather than full rotation.
It may feel gentler than a strongly rotating device, depending on the brush head and speed.
Many models include:
- Timers
- Multiple speeds
- Replaceable heads
- Pressure indicators
Follow the device instructions because recommended use varies.
Silicone Cleansing Brush
Silicone devices use flexible silicone touchpoints rather than traditional bristles.
Possible advantages include:
- Easier cleaning
- Faster drying
- Less frequent head replacement
- Softer feel
- Reduced product buildup inside bristles
They can still cause over-cleansing when used too often or with too much pressure.
Manual Facial Brush
A manual brush has no motor.
You control the pressure and movement directly.
Advantages may include:
- Lower cost
- No charging
- Easy travel
- Simple operation
However, it is easy to scrub too strongly because there is no timer or pressure control.
Dual-Sided Cleansing Device
Some devices combine:
- Fine silicone points for cleansing
- Larger ridges for massage
- Different textures for different facial areas
Use each side only as directed.
A massage surface should not automatically be used around the eyes or on irritated skin.
Is a Facial Cleansing Brush Suitable for Every Skin Type?
Not necessarily.
Some skin types tolerate cleansing brushes well, while others may find them uncomfortable.
The brush may be more suitable for:
- Normal skin
- Oily-feeling skin
- Combination skin
- People who wear heavier sunscreen
- People who prefer a device-based routine
Use more caution with:
- Very dry skin
- Sensitive-feeling skin
- Skin prone to redness
- Active irritation
- Sunburn
- Open blemishes
- Recently exfoliated skin
- Skin recovering from cosmetic procedures
Persistent burning, swelling, or worsening redness should be assessed by a qualified healthcare professional.
How to Choose a Facial Cleansing Brush
Consider the following factors.
Brush material
Choose soft bristles or flexible silicone.
Avoid very stiff bristles that feel scratchy against the skin.
Speed settings
Multiple settings allow you to begin gently.
A low setting is enough for most routines.
Timer
A built-in timer can prevent overuse.
Pressure control
Some devices alert you when you are pressing too hard.
Replaceable heads
Check the cost and availability of replacement heads before buying.
Water resistance
Confirm whether the device is safe to use near a sink or in the shower.
Water-resistant and waterproof do not always mean the same thing.
Ease of cleaning
The brush should be easy to rinse and dry fully.
Charging and battery
Consider whether it uses:
- USB charging
- Charging base
- Replaceable batteries
- Proprietary charger
A device that is inconvenient to maintain may not be used consistently.
Step 1: Remove Heavy Makeup First
Do not rely on a facial cleansing brush alone to remove heavy makeup.
Begin with:
- Cleansing balm
- Cleansing oil
- Micellar water
- Eye makeup remover
Remove:
- Long-wear foundation
- Waterproof mascara
- Eyeliner
- Lipstick
- Heavy sunscreen
The brush can then be used with a water-based cleanser as the second cleansing step.
Using a dirty brush directly over heavy makeup can push product deeper into the bristles.
Step 2: Wet the Face
Splash the face with lukewarm water.
Avoid very hot water because it may make the skin feel dry or uncomfortable.
Make sure the skin is evenly damp before using the brush.
Using a cleansing brush on dry skin may create unnecessary friction unless the device is specifically designed for dry use.
Step 3: Wet the Brush Head
Wet the brush head when recommended by the manufacturer.
For silicone devices, a light rinse is usually enough.
For bristle brushes, make sure the bristles are damp but not excessively dripping.
Do not submerge a device unless it is specifically rated for full immersion.
Step 4: Apply a Gentle Cleanser
Use a cleanser with good slip.
You can apply it:
- Directly to the face
- Onto the brush head
- To both, using a small amount
A small amount is usually enough.
Avoid using the device with cleansers containing rough particles.
Related guide: How to Choose a Cleanser for Your Skin Type
Best Cleanser to Use With a Facial Brush
Good options usually include:
- Gentle gel cleanser
- Cream cleanser
- Lotion cleanser
- Low-foaming cleanser
- Fragrance-free cleanser
- Non-exfoliating cleanser
The cleanser should allow the brush to glide without tugging.
Avoid pairing the brush with:
- Facial scrub
- Cleansing grains
- Strong exfoliating acids
- Harsh soap
- Thick clay cleanser
- Highly fragranced formulas when skin is sensitive
- Products that sting during normal cleansing
The brush already provides physical movement, so a separate scrub is usually unnecessary.
Step 5: Start on the Lowest Setting
Begin with the lowest speed or intensity.
A stronger setting does not necessarily clean better.
Starting low helps you assess:
- Comfort
- Skin response
- Pressure
- Product slip
- Device strength
Increase the setting only when the device instructions allow it and the lower setting feels ineffective without causing discomfort.
Step 6: Use Light Pressure
Rest the brush lightly against the skin.
Do not push it into the face.
Excessive pressure may:
- Increase friction
- Make redness more noticeable
- Cause discomfort
- Disturb active blemishes
- Wear down brush heads faster
- Reduce movement on some devices
Some powered brushes work less effectively when pressed too hard.
Let the device move across the skin rather than forcing it.
Step 7: Move Across the Face Slowly
Use small circular or gliding movements according to the device instructions.
A practical order is:
- Forehead
- One cheek
- Other cheek
- Nose
- Chin
- Jawline
Keep the device moving.
Do not repeatedly scrub the same area because it feels oily or textured.
How Long Should You Use a Facial Cleansing Brush?
Many devices are designed for approximately 30 to 60 seconds of total use.
Check the manufacturer’s recommended session length.
A simple timing guide might be:
- Forehead: 10 seconds
- Each cheek: 10 seconds
- Nose and chin: 10 to 15 seconds
- Jawline: remaining time
Longer use is not automatically more effective.
Stop earlier when the skin begins to feel uncomfortable.
Areas to Avoid
Avoid using the brush directly over:
- Eyelids
- Lash line
- Lips
- Open cuts
- Sunburn
- Broken skin
- Painful blemishes
- Active rash
- Areas with significant irritation
- Recently treated cosmetic areas
Use special caution around the nose because repeated pressure may cause redness.
Can You Use a Facial Cleansing Brush Around the Eyes?
Most standard cleansing brushes should not be used directly on the eyelids or close to the lash line.
The skin around the eyes is thin and delicate.
Remove eye makeup separately with an appropriate remover and soft pad.
Some devices include an attachment specifically designed for the eye area, but it should only be used according to the manufacturer’s directions.
Step 8: Rinse Thoroughly
Rinse the face with lukewarm water.
Make sure cleanser is removed from:
- Hairline
- Sides of the nose
- Jawline
- Eyebrows
- Around the ears
Use your hands rather than continuing to brush during rinsing unless the device instructions say otherwise.
Step 9: Pat the Skin Dry
Use a clean, soft towel.
Pat rather than rubbing.
The skin should feel clean and comfortable, not tight or sore.
If it feels unusually dry after each use, reduce the frequency or change the cleanser.
Step 10: Apply Moisturizer
Follow with a simple moisturizer.
A basic post-cleansing routine may include:
- Hydrating toner, when used
- Serum
- Moisturizer
- Sunscreen in the morning
Avoid applying several strong exfoliating or treatment products immediately after using the brush when your skin is easily irritated.
Related guide: What Order Should Skincare Products Be Applied In?
How Often Should You Use a Facial Cleansing Brush?
Begin once or twice per week.
After observing how your skin responds, you may adjust the frequency.
A general guide:
| Skin type | Suggested starting frequency |
|---|---|
| Dry skin | Once weekly |
| Sensitive-feeling skin | Once weekly or less |
| Normal skin | One to three times weekly |
| Combination skin | One to three times weekly |
| Oily-feeling skin | Two to three times weekly |
| Mature-looking skin | Once or twice weekly |
These are starting points, not strict requirements.
Daily use may be suitable for a very gentle silicone device when the manufacturer recommends it, but many people do not need to use a brush every day.
Can You Use a Facial Cleansing Brush Twice a Day?
Using one twice daily may be excessive for many people.
Frequent mechanical cleansing can contribute to:
- Dryness
- Tightness
- Visible redness
- Flaking
- Increased sensitivity
- Discomfort when applying skincare
Use clean hands for the other daily cleanse.
A cleansing brush should improve your routine, not make the skin feel constantly polished or stripped.
Should You Use It in the Morning or at Night?
Evening is usually the most useful time because the skin may have:
- Sunscreen
- Makeup residue
- Oil
- Sweat
- Daily buildup
Morning use may feel unnecessary, especially for dry or sensitive-feeling skin.
A simple morning cleanse with hands may be enough.
Can You Use a Facial Brush Every Day?
Some manufacturers design their devices for daily use, but individual tolerance varies.
Daily use may be too frequent when:
- Your cleanser already exfoliates
- You use retinoids
- You use exfoliating acids
- Your skin feels dry
- Redness increases
- You have recently had a cosmetic treatment
- You use other physical exfoliation tools
Reduce frequency at the first sign of discomfort.
Facial Cleansing Brush for Dry Skin
Dry skin should use a cautious routine.
Choose:
- Soft silicone device
- Very soft bristles
- Cream cleanser
- Low speed
- Short sessions
- Once-weekly use
Follow with moisturizer immediately after cleansing.
Stop using the brush when dryness or flaking becomes more noticeable.
Facial Cleansing Brush for Oily Skin
Oily-feeling skin may enjoy the cleaner sensation of a facial brush, but aggressive cleansing is still unnecessary.
Use:
- Gentle gel cleanser
- Low or medium setting
- Two or three sessions per week
- Light pressure
- Thorough brush cleaning
Avoid attempting to remove all natural oil from the skin.
A tight feeling is not a sign of better cleansing.
Facial Cleansing Brush for Combination Skin
Focus on the oilier areas without overworking the dry areas.
You can:
- Spend slightly more time around the nose and chin
- Use very light contact on the cheeks
- Skip dry areas
- Use a gentle cleanser over the whole face
- Apply richer moisturizer to dry sections
Do not repeatedly run the device over the T-zone for several minutes.
Facial Cleansing Brush for Sensitive-Feeling Skin
A cleansing brush may not be suitable when your skin reacts easily.
When trying one:
- Choose soft silicone
- Use the lowest setting
- Begin once every one or two weeks
- Use a fragrance-free cleanser
- Keep the session brief
- Avoid other exfoliation that day
Stop if you notice persistent burning, redness, itching, or discomfort.
Facial Cleansing Brush for Blemish-Prone Skin
Use caution around inflamed blemishes.
A facial brush may help remove surface oil and residue, but it does not treat the underlying causes of breakouts.
Avoid scrubbing:
- Painful spots
- Open blemishes
- Areas that bleed
- Recently picked skin
- Irritated treatment areas
Keep the brush extremely clean.
Do not share it with another person.
Facial Cleansing Brush for Mature-Looking Skin
Choose a soft brush and use minimal pressure.
A practical routine includes:
- Cream cleanser
- Low setting
- Short session
- Once or twice weekly
- Immediate moisturizer
- Minimal additional exfoliation
Avoid dragging the skin or using a stiff brush head.
Can a Facial Cleansing Brush Remove Blackheads?
A brush may remove surface buildup and make the skin feel smoother, but it is unlikely to remove established blackheads completely.
Blackheads form inside pores and may require a suitable leave-on product or professional guidance.
Excessive scrubbing may make the surrounding skin irritated without clearing the pore.
Can It Make Pores Smaller?
A cleansing brush cannot permanently change pore size.
It may temporarily make pores look less noticeable by removing surface oil and residue.
Pore appearance is also influenced by:
- Genetics
- Oil production
- Skin elasticity
- Lighting
- Makeup
- Buildup
Claims that a brush permanently closes or shrinks pores should be treated cautiously.
Can It Help With Makeup Removal?
A cleansing brush may help remove remaining foundation or sunscreen after an initial makeup-removal step.
It should not be used directly over heavy eye makeup or thick layers of foundation without first removing most of the product.
A useful evening routine is:
- Makeup remover or cleansing balm
- Gentle cleanser with the brush
- Moisturizer
This reduces the amount of makeup that collects inside the brush head.
Can You Use a Facial Brush With Retinoids?
Use caution.
Retinoid products may make some people more prone to dryness or sensitivity.
When using a retinoid:
- Reduce brush frequency
- Avoid using the brush on irritated nights
- Do not combine it with additional scrubs
- Use a gentle cleanser
- Monitor for redness and flaking
A hands-only cleansing routine may be more comfortable.
Can You Use It With Exfoliating Acids?
Using a physical cleansing brush with exfoliating acids may create too much exfoliation.
Avoid combining the brush in the same routine with strong:
- Glycolic acid
- Lactic acid
- Mandelic acid
- Salicylic acid
- Exfoliating peel
- Scrub
Alternate days when necessary and reduce frequency.
Can You Use It Before Shaving the Face?
Using a cleansing brush immediately before facial shaving or dermaplaning may make the skin more sensitive.
A simple hands-only cleanse is often enough before shaving.
Avoid the brush afterward until the skin feels completely comfortable again.
Can You Use It After a Facial Treatment?
Avoid using a facial cleansing brush immediately after procedures such as:
- Chemical peels
- Laser treatments
- Microneedling
- Dermaplaning
- Strong exfoliating facials
- Waxing
- Professional extractions
Follow the aftercare guidance provided by the practitioner.
Resume device use only after the skin has recovered.
How to Clean a Facial Cleansing Brush
Clean the brush after every use.
A basic method:
- Turn off the device.
- Remove the brush head when designed to detach.
- Rinse thoroughly with lukewarm water.
- Apply a small amount of mild soap.
- Massage gently through the bristles or silicone points.
- Rinse again.
- Shake off excess water.
- Leave it in an open area to dry.
Do not place a damp brush in a closed container.
How to Disinfect a Facial Brush
Routine washing with mild soap is enough for many devices.
Check the manufacturer’s instructions before using alcohol or disinfectant because some materials may be damaged.
Do not boil the brush head unless the manufacturer explicitly states that it is safe.
Strong household cleaners should not be used on a tool that touches the face.
How Often Should You Replace the Brush Head?
Replacement timing depends on the device.
Traditional bristle heads may need replacement every two to three months, while some silicone devices are designed to last much longer.
Replace the head sooner when:
- Bristles become bent
- The texture becomes rough
- It develops an odor
- Discoloration remains after cleaning
- The head no longer dries properly
- Bristles begin shedding
- The manufacturer recommends replacement
Follow the specific device schedule.
How to Store the Brush
Store it:
- In a clean, dry location
- With airflow
- Away from toilet areas
- Away from standing water
- Outside sealed travel cases until fully dry
- Separate from other users’ brushes
A bathroom drawer is suitable only after the device is completely dry.
Can You Share a Facial Cleansing Brush?
Do not share a brush head.
Sharing may transfer:
- Oil
- Makeup residue
- Skin cells
- Microorganisms
- Product buildup
Some devices allow separate interchangeable heads for different household members.
Label and store them separately.
Why Does My Face Feel Tight After Using the Brush?
Possible causes include:
- Excessive pressure
- Using it too long
- Using it too frequently
- Harsh cleanser
- Hot water
- Stiff brush head
- Combining it with exfoliating products
- Not applying moisturizer
Reduce the frequency and switch to a gentler cleanser.
Stop using the device temporarily when tightness persists.
Why Is My Skin Red After Using It?
Temporary mild flushing may occur from mechanical movement, but strong or long-lasting redness suggests the routine may be too intense.
Possible causes include:
- Pressing too hard
- High device setting
- Long session
- Sensitive skin
- Strong cleanser
- Recent exfoliation
- Dirty brush head
Use a lower setting or stop using the device.
Can a Cleansing Brush Cause Breakouts?
A cleansing brush may contribute to problems when:
- It is not cleaned properly
- It is used over inflamed skin
- It causes irritation
- It spreads heavy makeup residue
- The cleanser does not suit the skin
- Use is too frequent
New breakouts should not automatically be treated as “purging.”
Cleansing brushes do not usually contain active ingredients that create a predictable purging process.
Common Facial Cleansing Brush Mistakes
Pressing too hard
The device should touch the skin lightly.
Using it for several minutes
Long sessions increase friction without necessarily improving cleansing.
Using it twice every day
Frequent use may be too intense.
Pairing it with a scrub
This creates unnecessary double exfoliation.
Using it on dry skin
This can increase friction unless the device is designed for dry use.
Applying it over heavy makeup
Remove most makeup first.
Ignoring the eye area warning
Standard brush heads are usually too strong for the eyelids.
Failing to clean the brush
Product and moisture can collect inside the head.
Storing it while wet
A closed, damp environment prevents proper drying.
Sharing the brush head
Each user should have a separate head.
Assuming redness means it is working
Persistent redness is a sign to reduce or stop use.
A Simple Beginner Routine
For first-time users:
- Remove makeup.
- Wet your face.
- Apply gentle cleanser.
- Use the lowest setting.
- Cleanse for 30 seconds.
- Use almost no pressure.
- Rinse thoroughly.
- Apply moisturizer.
- Wait several days before using the device again.
Observe how your skin feels for the next 24 hours.
A Simple Evening Routine With a Facial Brush
- Remove eye and lip makeup.
- Use cleansing balm when wearing heavy makeup or sunscreen.
- Rinse.
- Apply gentle water-based cleanser.
- Use the facial brush briefly.
- Rinse and dry the skin.
- Apply hydrating serum.
- Apply moisturizer.
Keep the remaining routine simple on brush-use nights.
When Should You Stop Using a Facial Brush?
Stop using the device when you notice:
- Burning
- Persistent redness
- Pain
- Increased flaking
- Raw-feeling skin
- Worsening irritation
- Bleeding
- Swelling
- Rash
- Increased sensitivity to ordinary products
Allow the skin to recover before deciding whether to try a softer device or less frequent schedule.
Frequently Asked Questions
How often should I use a facial cleansing brush?
Begin once or twice per week. Increase only when your skin remains comfortable and the device instructions support more frequent use.
Should I use a cleansing brush before or after removing makeup?
Remove heavy makeup first. Use the brush with a gentle cleanser afterward.
Can I use a facial cleansing brush every day?
Some gentle devices are designed for daily use, but many people do not need that frequency. Daily use may cause dryness or irritation.
What cleanser should I use with a facial cleansing brush?
Use a gentle gel, cream, or low-foaming cleanser without scrub particles or strong exfoliating acids.
How long should I use the brush?
Most sessions should last approximately 30 to 60 seconds, depending on the manufacturer’s directions.
Can a facial cleansing brush remove blackheads?
It may remove surface buildup but is unlikely to remove established blackheads completely.
Should the brush be used on wet or dry skin?
Most cleansing brushes are designed for wet skin with cleanser. Check the instructions for your specific device.
How do I clean the brush?
Rinse it after every use, wash it with mild soap, and allow it to dry completely in an open area.
Final Thoughts
A facial cleansing brush should support gentle cleansing rather than turn the routine into aggressive scrubbing.
Remove heavy makeup first, use a mild cleanser, begin on the lowest setting, and keep the session brief. Light pressure is enough because the device provides the movement.
Start once or twice per week and adjust according to how your skin responds. Dry, sensitive-feeling, or treatment-exposed skin may need less frequent use or may be better suited to hands-only cleansing.
The brush should leave the skin feeling clean and comfortable. Tightness, burning, persistent redness, or flaking are signs that the routine needs to be reduced or stopped.
